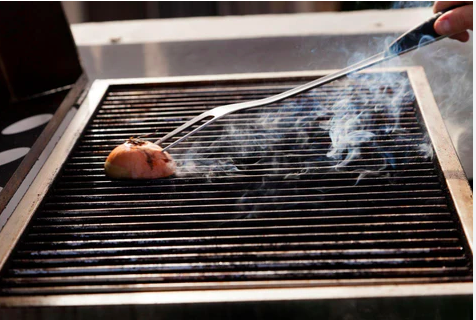
Summer is here, and your grill is likely working overtime to provide delicious meals for family and friends. Whether you are a weekend grill master or someone who uses the grill almost daily, proper cleaning is crucial for safety, hygiene, and prolonging the life of your equipment. A clean grill not only looks appealing but also ensures better-tasting food by preventing old grease and carbon buildup from transferring flavors. In this guide, we’ll explore easy tips to clean your grill, step by step, so you can enjoy a spotless, efficient, and safe grilling experience all summer long.
Why Cleaning Your Grill Matters
Cleaning your grill is more than just an aesthetic choice. Leftover grease, food debris, and carbon buildup can:
-
Become a breeding ground for bacteria
-
Cause flare-ups or grease fires
-
Affect the taste of your food
-
Reduce the lifespan of your grill
Neglecting to clean your grill regularly may lead to costly repairs or even safety hazards. With just a few minutes of attention after each use and some deeper cleanings periodically, you can keep your grill in top shape.
Step 1: Safety First
Before starting any cleaning, ensure your grill is cool and the gas is turned off. Cleaning a hot grill can lead to burns or accidents. Wearing gloves is recommended, especially if your hands are sensitive to grease or cleaning detergents. Having the right safety precautions will make the process safer and more efficient.
Step 2: Remove and Soak the Grates
The grates are the most used parts of your grill and often accumulate the most grime.
-
Remove the grates carefully.
-
Fill a basin or large container with hot, soapy water. Dishwashing liquid works perfectly.
-
Soak the grates for at least 15–30 minutes to loosen grease and charred food particles.
Soaking softens the stubborn buildup, making it easier to scrub without damaging the metal surface.
Step 3: Scrub the Grill Interior
While your grates soak, focus on the inside of your grill:
-
Use a wire brush to scrub the underside of the grill hood and the inner walls.
-
Pay special attention to areas with carbon buildup from smoke and grease.
-
Wipe the surfaces afterward with a damp cloth to remove loosened debris.
Regularly cleaning the interior prevents excessive buildup that can affect cooking performance and even cause unpleasant smoke during grilling.
Step 4: Clean the Drip Pan or Grease Tray
Your grill’s drip pan or grease collection tray catches fat and juices during cooking. Proper maintenance is critical to prevent flare-ups:
-
If the drip pan is disposable, simply throw it away.
-
For reusable trays, empty the contents into a trash can and soak the tray in the warm, soapy water solution.
-
Scrape off any stuck-on grease with a wire brush, rinse, and replace.
Frequent cleaning of your drip pan helps maintain hygiene and reduces the risk of grease fires.
Step 5: Scrub and Rinse the Grates
After soaking, the grates are ready for scrubbing:
-
Use a wire brush or a grill brush to remove remaining residue.
-
Rinse thoroughly with warm water to remove soap and debris.
-
Replace the grates in the grill once fully dry.
For stainless steel or porcelain-coated grates, avoid overly abrasive tools that may scratch the surface. Regular maintenance after each grilling session will make this step faster and easier.
Step 6: Clean the Propane Tank Cabinet and Exterior
Even areas that don’t directly touch food need cleaning:
-
Remove debris from the cabinet housing your propane tank. This prevents pests and buildup over time.
-
Wipe down the exterior of the grill with a window cleaner or stainless steel cleaner, depending on your grill’s material.
Keeping your grill’s exterior clean improves its appearance and ensures all components function properly.
Step 7: Routine Upkeep After Grilling
Maintaining a clean grill doesn’t have to be overwhelming. With simple habits, your grill can stay spotless throughout the season:
-
Scrape warm grates after each use. This prevents food from sticking next time.
-
Empty or replace the drip pan regularly to avoid grease fires.
-
Check for buildup inside the grill every few weeks and do a deeper clean if needed.
Routine upkeep reduces the need for time-consuming deep cleans and keeps your grill ready for any spontaneous barbecue.
Step 8: Extra Tips for Easy Grill Maintenance
Here are some additional strategies to make grill cleaning even easier:
-
Use a grill mat or foil under the grates to catch drippings.
-
Preheat the grill before cooking; it makes scraping off food easier afterward.
-
Oil your grates lightly before cooking to reduce sticking.
-
Store your grill covered when not in use to prevent dust, debris, and moisture buildup.
These simple tips not only make cleaning easier but also prolong the life of your grill.
Conclusion
Cleaning your grill doesn’t have to be a chore. With proper safety, regular maintenance, and a few practical strategies, you can enjoy a spotless grill and consistently delicious meals throughout the summer. Remember, a clean grill is a safe grill, and taking the time to care for it pays off in better food, reduced flare-ups, and extended equipment lifespan. Follow these easy tips to clean your grill, and you’ll become the ultimate summer grill master in no time.


