If you love hiking, cycling, or any outdoor adventure, a hydration bladder is one of the most convenient ways to stay hydrated. Unlike bulky water bottles, hydration packs are lightweight and easy to carry. But without regular cleaning, they can quickly develop mold, mildew, and bacteria that contaminate your water supply. This detailed guide explains how to clean, sanitize, and dry your hydration bladder safely using everyday items, so you can always drink clean and fresh water on the go.
Why Cleaning Your Hydration Bladder Matters
Hydration bladders are exposed to moisture and warmth — the perfect conditions for bacterial growth. If not cleaned properly after each use, they can develop an unpleasant odor, discoloration, or slimy residue inside the tube and reservoir. Regular cleaning not only prevents these issues but also extends the lifespan of your bladder and ensures safe hydration during your adventures.
Part 1: Choosing the Right Cleaning Solution
Before you start scrubbing, it’s important to pick the right cleaning solution. Here are three effective options depending on your preference and budget.
1. Make a Homemade Sanitizing Solution
You can easily make a powerful cleaner with baking soda, bleach, and water:
-
Mix 1 teaspoon of baking soda with 1 teaspoon of bleach in a liter of water.
-
The bleach disinfects, while the baking soda neutralizes odor.
-
Stir well before pouring into your hydration bladder.
This is an inexpensive yet highly effective way to eliminate bacteria and odor.
2. Use Hydration Bladder Cleaning Tabs
Many outdoor brands sell hydration bladder cleaning tablets designed for this exact purpose. These tabs usually contain chlorine dioxide, a safe disinfectant that kills bacteria and removes residue. Just drop one tablet into the bladder filled with warm water, let it dissolve, and follow the instructions on the package.
You can find these tabs at outdoor gear stores or online retailers like CamelBak or Osprey.
3. Try Denture Cleaning Tablets
If you can’t find hydration cleaning tabs, denture tablets are a great alternative.
-
Use one tablet per liter of water.
-
Allow it to dissolve fully before use.
-
These tablets are affordable and available at any supermarket or pharmacy.
Part 2: Cleaning Your Hydration Bladder
Now that your cleaning solution is ready, follow these steps to deep clean your hydration bladder.
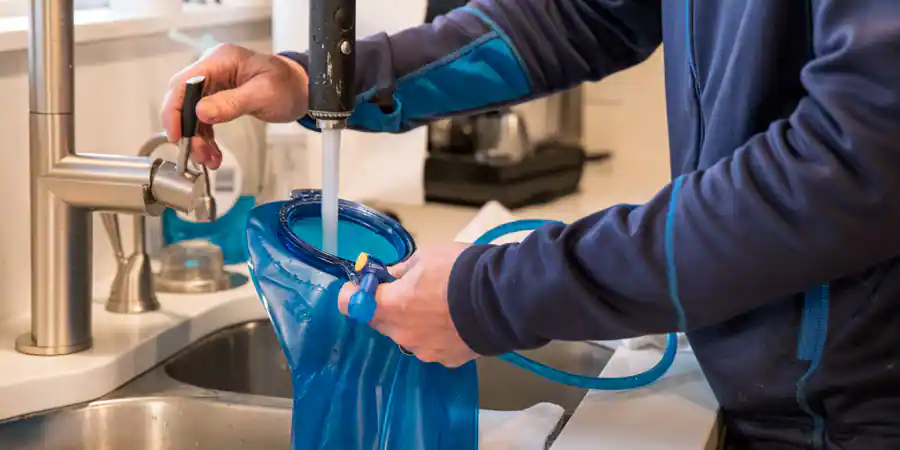
1. Fill the Bladder with Warm (Not Hot) Water
Warm water helps loosen dirt and residue inside the bladder. Avoid boiling water, as it can damage the bladder’s lining. Perform all cleaning steps over a sink to catch spills.
2. Add the Cleaning Solution
Pour your chosen cleaning solution or tablet mixture into the bladder. Seal it tightly and gently shake to distribute the liquid evenly. This ensures that every surface is exposed to the sanitizer.
3. Let It Soak
Let the bladder sit for about 30 minutes if using bleach and baking soda. For cleaning tablets, check the product label for the recommended soak time. While soaking, you can clean the drinking tube and bite valve.
4. Clean the Tube and Bite Valve
Hold the sealed bladder above your head to let gravity push the cleaning solution through the tube. Pinch the bite valve to let some solution flow out, then close it to trap the liquid inside. This disinfects the internal areas that often harbor mold or bacteria.
5. Soak the Tube
Allow the cleaning solution to remain in the tube for about 30 minutes (or 5–10 minutes for cleaning tabs). This helps break down residue and kill germs effectively.
6. Rinse Thoroughly
Once soaking is complete, drain the bladder and flush the tube and valve with clean water. Rinse until there’s no trace of soap or cleaning solution left. It’s crucial to remove all residue to avoid unpleasant tastes when drinking later.
7. Wash with Soapy Water
Add a few drops of mild dish soap to the bladder, fill it with warm water, and shake again. Let some of the soapy water run through the tube and bite valve. This removes any leftover cleaning agents and ensures complete cleanliness.
8. Scrub the Inside Surfaces
Use a bottle cleaning brush to scrub inside the bladder. For the tube, a hydration hose brush works perfectly. If you don’t have one, attach a soft cloth to a long wire and gently push it through the tube until it comes out clean. Repeat as needed.
9. Final Rinse
Rinse the bladder, tube, and bite valve thoroughly with clean water until there’s no soap or residue left. This prevents bad taste and ensures safe drinking water.
Part 3: Drying Your Hydration Bladder Properly
Drying is just as important as cleaning because leftover moisture leads to mold and mildew. Follow these simple steps to dry your bladder completely.
1. Disassemble for Drying
Separate all components — the bladder, tube, and bite valve. Shake out as much water as possible. If the valve doesn’t detach, pinch it several times to remove trapped water.
2. Hang It to Air Dry
Hang the bladder on a clothes hanger using clothespins to keep it open for airflow. Drape the tube over the hanger, allowing both ends to drip dry. You can stuff the bladder with paper towels to help it stay open and absorb moisture.
3. Let It Dry Completely
Choose a low-humidity area (avoid bathrooms) and let the bladder air-dry completely before storing it. Moisture left inside will cause mold to return, so take your time during this step.
Pro Tips for Maintaining a Clean Hydration Bladder
-
Clean your hydration bladder after every use, especially after storing sugary drinks.
-
Avoid freezing water inside the bladder, as it can damage the material.
-
Store the bladder uncapped and dry to prevent trapped moisture.
-
For long-term storage, keep it in the freezer to stop bacterial growth.
Conclusion
Cleaning your hydration bladder is simple but essential for your health and hydration. With the right cleaning solution and proper drying technique, you can eliminate bacteria, odor, and mold buildup for good. Make it a habit to clean your bladder after every use, and you’ll always have fresh, great-tasting water for your next outdoor adventure.


