Cleaning your plastic water tank may seem like a tough chore, but it’s essential to keep your water clean, safe, and free from bacteria or algae buildup. Over time, tanks accumulate silt, grime, and microorganisms that can contaminate your water supply. To ensure your water stays fresh and hygienic, it’s recommended to clean your tank at least once a year using the proper methods.
In this detailed guide, you’ll learn how to drain, clean, and disinfect your water tank safely and effectively using simple household tools and cleaning solutions.
Why Cleaning Your Water Tank Is Important
Plastic water tanks can collect algae, sediment, and harmful bacteria that thrive in damp conditions. If left uncleaned, these contaminants can cause water discoloration, foul odors, and even health issues when used for drinking or washing. Regular maintenance ensures your tank remains a reliable source of clean, fresh water year-round.
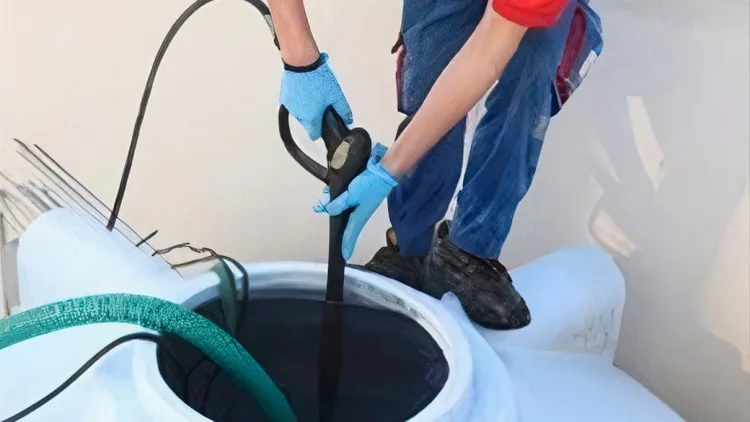
Part 1: Draining the Water Tank
Step 1: Open the Outlet Valve or Tap
Start by draining all the water from your tank. Open the outlet valve or bottom tap and let the water flow out naturally. If possible, connect a hose to the outlet so that the water drains into a safe area, avoiding erosion or flooding.
Tip: Many permanent tanks have a washout valve at the base — use this for quicker drainage instead of the outlet tap.
Step 2: Remove Remaining Water
Since the outlet valve often sits slightly above the tank floor, you’ll likely have some water left inside. Use a bucket to scoop out most of it, then a plastic cup or mug to remove what’s left.
Step 3: Dry the Tank Completely
For the last bit of water:
-
Use a wet/dry vacuum to suck up what remains.
-
If the tank is small and light, you can tilt it carefully to drain the rest.
-
Finish by using towels or rags to soak up the remaining moisture.
Part 2: Cleaning the Inside of the Water Tank
Step 1: Make a Cleaning Solution
Mix hot water with a small amount of laundry detergent powder or liquid in a bucket. This solution helps loosen dirt, grime, and algae stuck to the tank walls.
Step 2: Scrub the Tank Interior
Using a soft-bristle brush or non-abrasive sponge, scrub the inner walls thoroughly. Apply firm pressure and move horizontally across the surface. For large tanks, use a long-handled brush to reach deeper sections.
Avoid steel brushes or metal sponges, as they can scratch plastic surfaces.
Step 3: Use a Power Washer (Optional)
If your tank has heavy buildup, use a pressure washer with a range of 1,300–2,400 psi.
How to use it safely:
-
Fill it with clean water or your cleaning mixture.
-
Hold the nozzle about 3–4 feet away from the tank walls.
-
Spray at a 45-degree angle to dislodge grime.
Safety Tip: Wear goggles, never point the washer at people or pets, and follow the manufacturer’s safety instructions.
Step 4: Use Baking Soda for Tough Stains
For stubborn areas, sprinkle baking soda on the tank walls and scrub gently. Baking soda acts as a mild abrasive that removes slime without scratching.
Step 5: Scrub Corners and Joints
Residue often hides in corners or seams. Use a small toothbrush to scrub these hard-to-reach spots thoroughly.
Step 6: Rinse Thoroughly
Use a hose or pressure washer filled with clean water to rinse the tank. Ensure every surface, corner, and joint is free of soap and debris. Alternatively, fill the tank with clean hot water, let it sit for several hours, and drain completely. Repeat until the water runs clear.
Step 7: Vacuum Remaining Residue
If your tank is too large to tip or rinse completely, use a wet/dry vacuum to remove leftover detergent, dirt, or water from the bottom and corners.
Step 8: Flush Pipes and Hoses
Pour your cleaning mixture into the connected pipes or hoses, then use the water pump to circulate the solution through. Follow up with hot water to remove any leftover detergent or sediment.
Part 3: Disinfecting the Water Tank
Step 1: Fill the Tank with Clean Water
After scrubbing, fill the tank three-quarters full with clean water. This step prepares it for the disinfection process.
Step 2: Add Chlorine Bleach
Use household chlorine bleach (5% concentration) in a ratio of 50 parts per million (ppm). Refer to this guide for the right measurement:
-
250-gallon tank – 4 cups of bleach
-
500-gallon tank – ½ gallon of bleach
-
750-gallon tank – ¾ gallon of bleach
-
1,000-gallon tank – 1 gallon of bleach
Step 3: Fill to the Top
After adding bleach, fill the tank completely with water. This ensures even mixing throughout the tank.
Step 4: Let the Solution Sit for 24 Hours
Leave the chlorine solution inside the tank for 24 hours to fully disinfect the walls and interior surfaces. Keep the tank covered and ensure no one — including pets — comes into contact with the water during this time.
Step 5: Test Chlorine Levels
Use chlorine test strips every few hours to ensure a measurable level of chlorine remains during the full disinfection period. If chlorine levels drop to zero, repeat the bleach process.
Step 6: Drain and Rinse
Drain the entire tank using a hose, ensuring the chlorine water flows away from plants, soil, and natural water sources. Then rinse the tank multiple times with clean water until all bleach residue is gone.
Use towels or a vacuum to dry any remaining moisture before refilling your tank with fresh, potable water.
Final Tips for Maintaining a Clean Water Tank
-
Inspect your tank every few months for signs of algae growth or foul odor.
-
Keep the tank covered to prevent insects, dust, and debris from entering.
-
Avoid adding untreated water to the tank.
-
Disinfect pipes and hoses periodically to prevent recontamination.
-
Mark your calendar to schedule a tank cleaning once every 6–12 months for optimal hygiene.
Regular cleaning not only protects your health but also extends the lifespan of your plastic tank, ensuring clean water whenever you need it.